
Fixing The One Glaring Problem So Far
Pay off that technical now before compound interest sets in!

August 2023 Update:
With the Summer ‘23 release, Salesforce has added an extra step in the process of creating a named credential. I have updated the text below with that extra step.
If this substack were Star Wars1, this the point where we’re stuck in the trash compactor on the Death Star. Flush with success of getting our first integrations fully working, there’s a monster lurking we need to deal with…

and that monster is the technical debt we created when we embed our OpenAI API key in an Integration Procedure.
Gentle readers, I must confess: I’ve encouraged your bad habits so far2. If you’ve followed along the previous two weeks, you already have at least two IPs with embedded credentials, and probably a few more discards lying around.
There are lots of reasons this is bad:
If you need to change your key3, you have a bunch of places to change it.
You may not remember all the places, so the process is error prone4.
Every time you create a new Integration Procedure, you have to copy your key into it.
Every Integration Procedure with a hard-coded key increases the risk that someone else can “borrow” your key and run up a charge on your account5.
You can’t export your Integration Procedure without including the key unless you scrupulously edit it out (like I did last week, and I can tell you it’s a bit of a pain).
The good news is that Salesforce has a proper way of handling your API key. The bad news is that it can feel like a Rube Goldberg6 machine when you set it up.
Let me try to make amends for running up your technical debt by walking you through the process that will take care of the problem. Once this is working, we don’t have to do it again for other integrations you build in the future7. The extra effort we expend now will save you more time in the long run. Think of it as a high-interest, technical savings account8.
Switching to a Named Credential
There’s a whole chain of things that needs to be done to switch from embedded credentials to a Named Credential:
Create a custom Permission Set that grants specific users access to OpenAI.
Create an external credential that holds the logic of how to send the API key to Open AI.
Associate that external credential with our Permission Set and hide our secret key in that association.
Create a named credential that uses our external credential.
Create a new version of an existing Integration Procedure (or a completely bespoke one) that uses the Named Credential to verify it works.
What’s interesting about this is that there are many parts that appear to do almost nothing and yet all have to be there to make it work. I’ll do my best to try to get you in and out of trash compactor as quickly as possible, even if C3PO is having a bit of a meltdown at times…
Permission Set Creation
The way a private key (like your OpenAI API key) is made available to a named credential is via permission sets. While you can re-use any permission set you like to do this, it’s far better to create a special purpose permission set that we can use to tag users who are allowed access to the key9.
The process of creating the permission set is detailed in this video and text below:
Go into Setup and:
Search for Permission
Select Permission Sets
Press New
Enter OpenAIApi into the label, hit tab, and it’s copied to API Name.
Enter anything you wish for the description.
Hit Save
On the page for your new permission set, press “Manage Assignments”
On the next page click “Add Assignment”
On the Select Users to Assign page, select all the users you wish to have OpenAI API access. Especially yourself.
Press Next
On the next page, press Assign.
Press Done … and you’re done!
You might be wondering how this has anything to do with an API Key. Just stick with me…
Create an External Credential
Navigate to the Named Credentials page in Setup (enter “name” in the Quick Find box, click on Named Credentials). Oddly, if we try to create the named credential first, we will fail because we have to have our external credential already created. You’ll notice that the screen has a label “External Credentials” which is doing its very best to hide from you. Here’s how to create the External Credential:
Click it to bring up the External Credentials screen and then press the New button.
Enter OpenAIec (that’s a capital i not an el) for both the name and label. Pick an authentication protocol of Custom
Press Save.
Prior to Summer 23: Orgs without the concept of “Principals”
Click on the New button in Permission Set Mappings. Why do we need one? (1) It’s where we hide our API Key. (2) It’s how Salesforce knows which API key to use for which users (you can have different keys for different permission sets).
For the Permission Set, pick the one you created earlier. If you pick a permission set your user isn’t assigned to, nothing works later on; Salesforce pretends it doesn't know anything about an API Key in that case. Trust me, I’ve chased my tail on that one.
Click add for the Authentication Parameters, and give it a name of “OpenAIKey” with a value of … drumroll … your secret key from OpenAI (the one that starts with sk-…):
It won’t show it to you … ever10. Click Save!
After just enough of a delay for you to wonder if your internet is out, you’re returned to the screen in #4 above … but with your new Permission Set Mapping!
Now, click New for Custom Headers, and enter:
“Authorization” for Name
“Bearer {!$Credential.OpenAIec.OpenAIKey}” for Value
Press Save
Summer 23 Forward: Orgs with the new “Principal” Concept
Click on the New button in Principals
For Parameter Name, enter OpenAI
Click add for the Authentication Parameters, and give it a name of “OpenAIKey” with a value of … drumroll … your secret key from OpenAI (the one that starts with sk-…):
Press Save
Now, click New for Custom Headers, and enter:
“Authorization” for Name
“Bearer {!$Credential.OpenAIec.OpenAIKey}” for Value
Press Save
Go back to your permission set created above
Click the link “External Credential Principal Access”
Press Edit
Add in “OpenAIec - OpenAI” and save.
This is what it takes to add an Authorization header to your HTTP request (as required by OpenAI) with a value of the word “Bearer” followed by the secret sk- key (that you entered in step 6).
Congratulations, you have an External Credential! Now, you can create a Named Credential!
Intermezzo: What’s my Namespace?
Before we can create your named credential, we need to figure out what the namespace is for your OmniStudio package. In Setup, search for “Installed” and navigate to installed packages. You will see names like “omnistudio”:
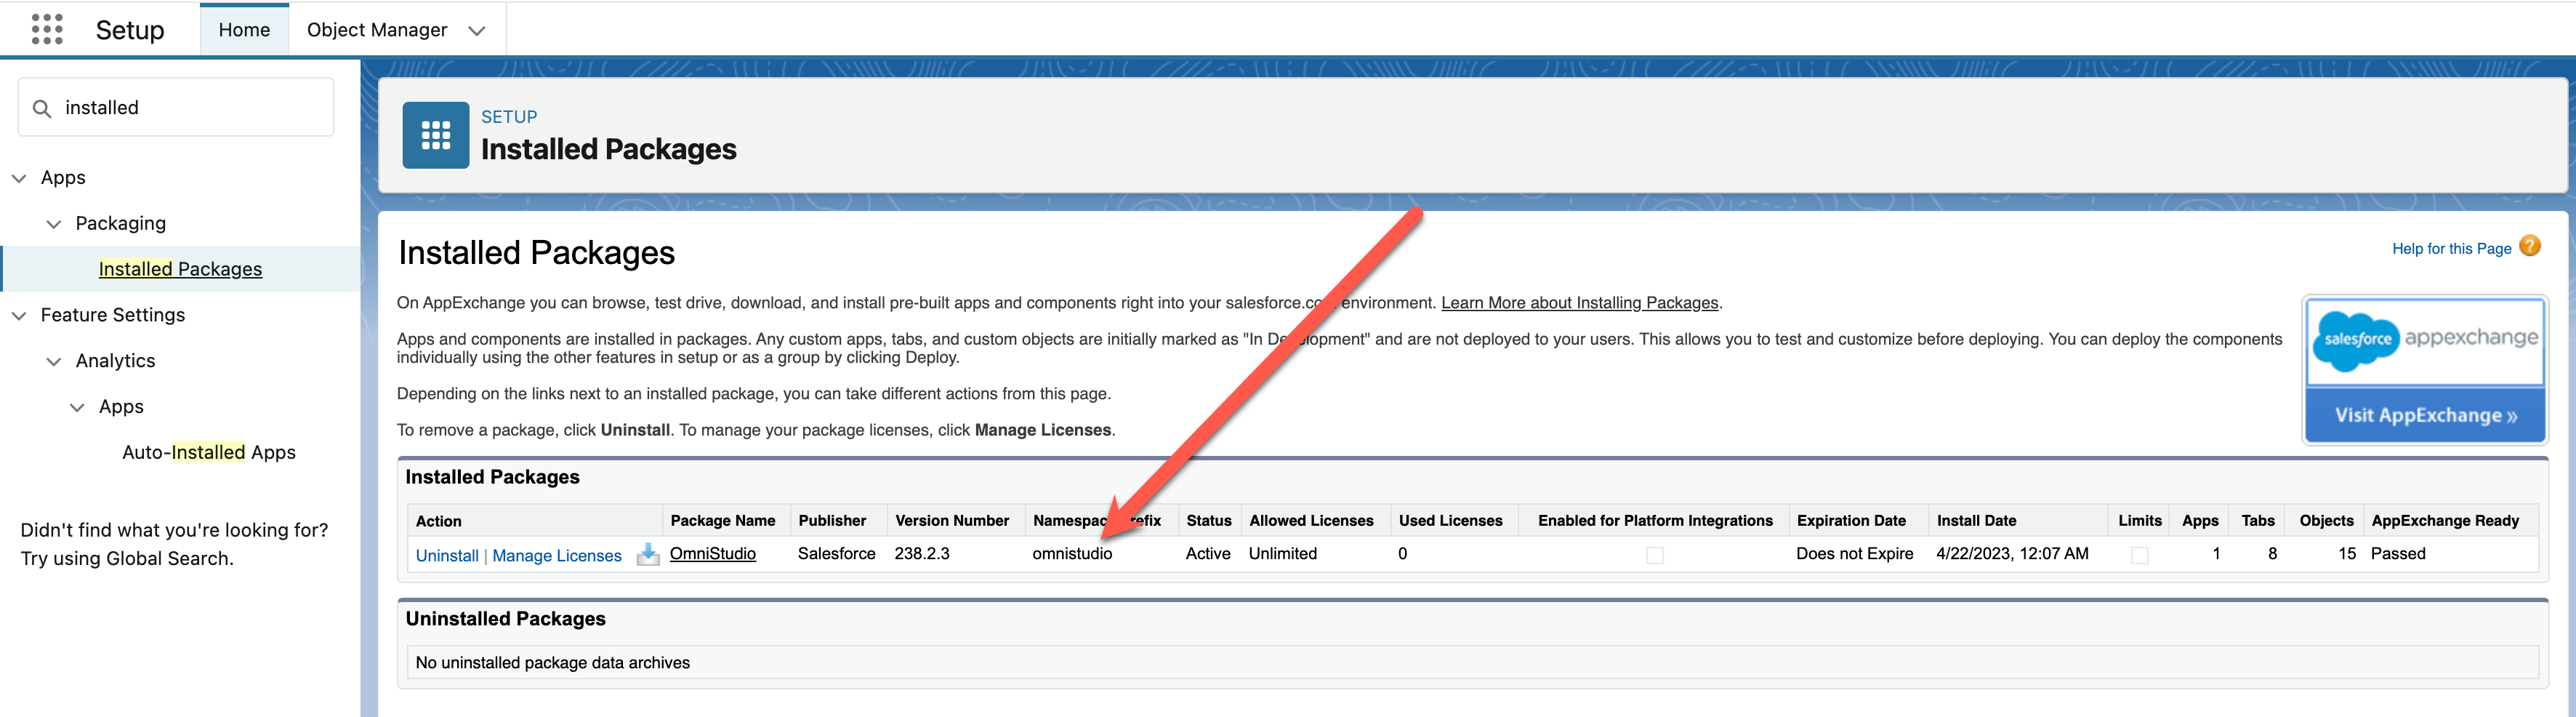
Or “vlocity_cmt” or “vlocity_ins”. Remember which one it is (and note the lack of capitalization … my fingers like to type OmniStudio all on their own when I should be typing omnistudio).
Create a Named Credential
Now, go back to Named Credentials, press the New button, and do the following steps:
Enter “OpenAI” for the name and label.
Enter “https://api.openai.com” for the URL.
Pick the name of our newly created external credential for the External Credential.
Click the box that says “Allow Formulas in HTTP Header”. We most definitely have a formula in mind.
Down at the bottom there’s a field called “Allowed Namespaces.” Put in it the name of your installed package we discovered above. If you don’t you get an error message like “The callout couldn't access the endpoint. You might not have the required permissions, or the named credential OpenAI might not exist."11
Press Save

That’s that!
Were you to go back to your external credential and drill into it, you would notice that you cannot see what the OpenAI API key is you entered. Nobody can; it’s about as safe as can be.
Testing Our Named Credential
I have great faith that you entered everything correctly and this will work for you. It didn’t for me on first try, though, because of fat fingers. So on the off chance that a gremlin flipped a bit when you weren’t looking, let’s give this a quick test? Or worse, I made a mistake (usually in capitalization in places) and you have to fix it!
Go back to an Integration Procedure that queries the OpenAI models (one that has a hard coded API Key). I’m using a getModels one, but it doesn’t matter too much. Now we’re going to do one of my all-time favorite “that was not obvious” features: we’re going to fork the Integration Procedure to create a new one that’s a copy of the old. Click on Create Version, and it thinks you want version 2 (or 3 or 4 or …) of what you have already. But we’re going to trick it and change the name in the process!

In the procedure configuration, enter something new for the SubType (best to be a variation on the existing name). You might even want to update the name. Press Save.
Now you have a completely new Integration Procedure, but with the contents of the old one as a starting point! (Evil Scientist Laugh Goes Here)
Now, let’s change the HTTP Action to use the Named Credential:

Change the HTTP Path to remove the “https://api.openai.com”, for example, change “https://api.openai.com/v1/models” to just “/v1/models”.
Now, add in the Named Credential of OpenAI.
Under the REST OPTIONS, delete the hard-coded authorization header.
(N.b.: don’t change the name unless you want to go change the Response Action to match. When it’s all working, you can clean it up.)
Go back to Preview and see if it works. If it does, congratulations, you’re done!
If it doesn’t, then here some things to check:
Did you get the namespace right?
Did you accidentally erase the API Key in the external credential?
Did you pick a permission set that you have?
Anything else that might be misspelt or mismatch between where it is defined and where it is referenced?
Have confidence that you will find it and fix it12. Then you won’t have to worry about it again because we have something we can re-use. You should go back and change all your Integration Procedures (it only takes a few seconds).
Now you’re all secure and future Integration Procedures will be easy to build!
If this Substack were Star Wars, I would be incredibly rich, so this analogy suffers from some flaws from the get go.
If you’ve found yourself at Starbucks at closing time, overly caffeinated with just one more thing you simply have to try, it’s my fault.
Here’s why your key is going to change: Your DevOps / SecurityOps best practice is to rotate keys. Somebody else has taken over billing. You might have a new account with a fresh $5 of free credits. Someone might have leaked your old key. The key is going to change far more often than you expect. Trust me on this.
OK, let’s say you want to make sure you’ve not left a key in by mistake but if you did, be able to find it quickly and fix it. How do you do that … in a way that won’t make you regret your life choices? Like this:
Use something like SoqlXplorer to do a SELECT Id, Name, OmniProcessId, OmniProcessVersionNumber, PropertySetConfig, Type FROM OmniProcessElement WHERE Type='Rest Action'
Export the results to a file and read through it (or search) the output for keys (‘sk-’)
If you find any, grab the “OmniProcessId” to find the corresponding Integration Procedure from the sobject “OmniProcess”
The naming of the various sobjects may change depending upon which version of OmniStudio you’re using, but that’s the gist of it. If it’s all in metadata, well, that’s a whole ‘nother can of worms but you get the idea.
But you set that limit on charges, yes?
Rube was a charming, comedic guy. I had no idea, really, that he had such a great on-camera persona until I did a bit of research for this post:
In this one org only. If you have lots of orgs you’re going to get good at it very quick, I’m sorry to say.
There was a time when people would actually expect a decent rate of return for their savings accounts, which was roughly the same time that bank jingles could become hit songs.
Why a new one? Why not reuse and existing one?
If you reuse the permission set for “able to access tic-tac-toe easter egg”, and some one deletes it or adds/removes users from it, that could break your integrations and be hard to debug.
Plus, being able to say “I had to create my own permission set” gives you street cred, as long as the street is the 700 block of Howard Street and it’s a certain week of each year.
And if you edit this again, it immediately forgets your api key so you have to re-enter it.
Being expert in a product is not knowing how to make things work, it’s knowing why they’re not working and how to fix them.
If you’re absolutely stumped, email me and I’ll look at it with you.
As of May 2023, there is an extra step in binding a Permission Set to an External Named Credential, as the Permission Sets list vanished in favour of an intermediary called Principals. To accommodate this, all you need to do is create a Principal record first (choose any Parameter Name you like), add your Authentication Params there, then after saving, navigate to the Permission Set and bind via the 'External Credential Principal Access'.